
How to tie a prusik knot
There are several variations on these types of hitches and it is common for climbers to carry several loops of line or continuous slings to form these fast handy connections. A prusik can form a strong anchor that doesn’t slide down a leg or steep diagonal. These are often tied in place of a mechanical rope ascender.
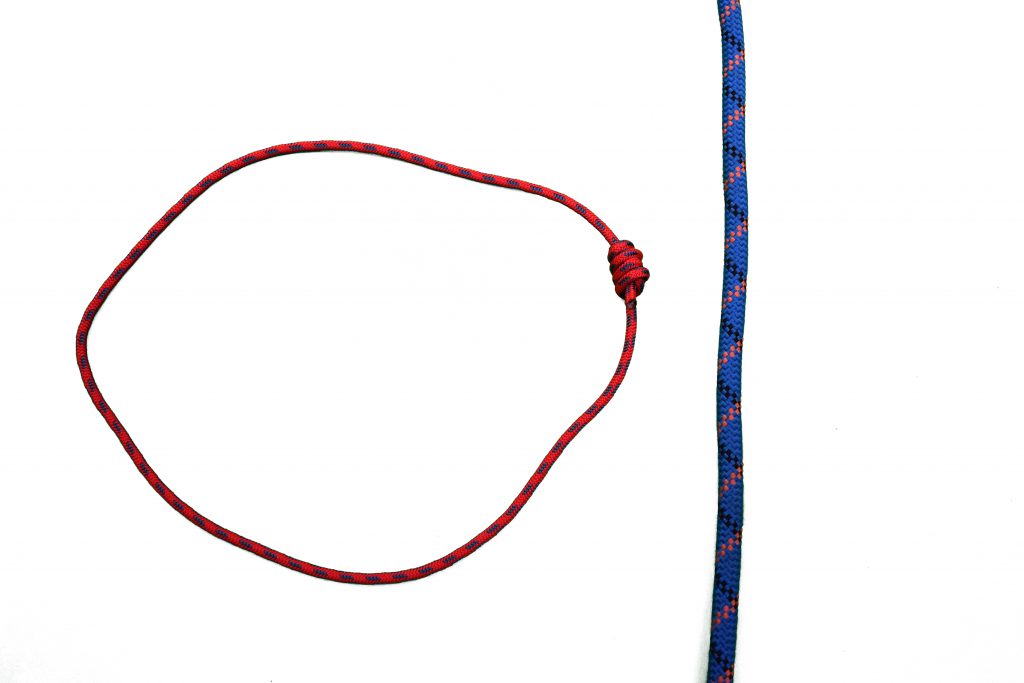
Step 1
Make your rope into an accessory cord by tying it into a type of bend.
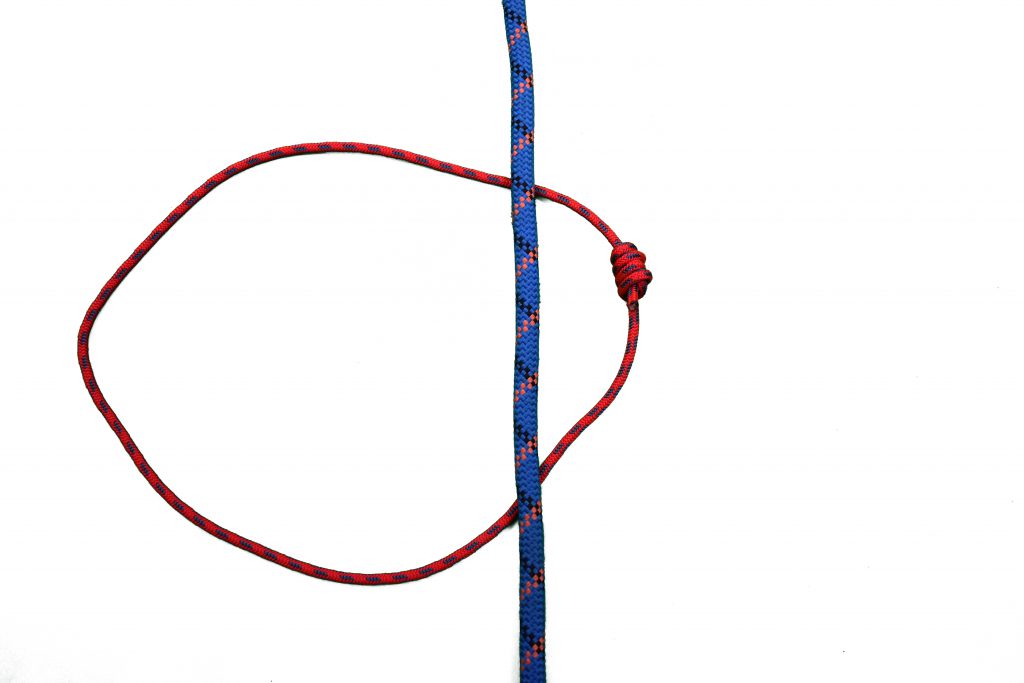
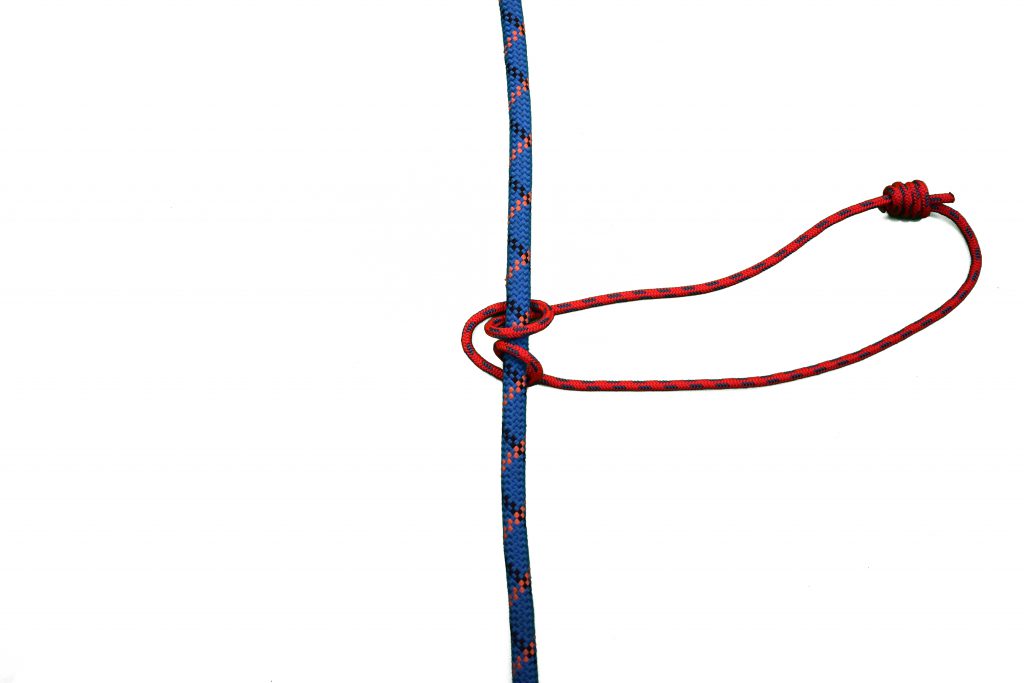
Step 2
Wrap the continued loop around the anchor (rope, diagonal, etc.)
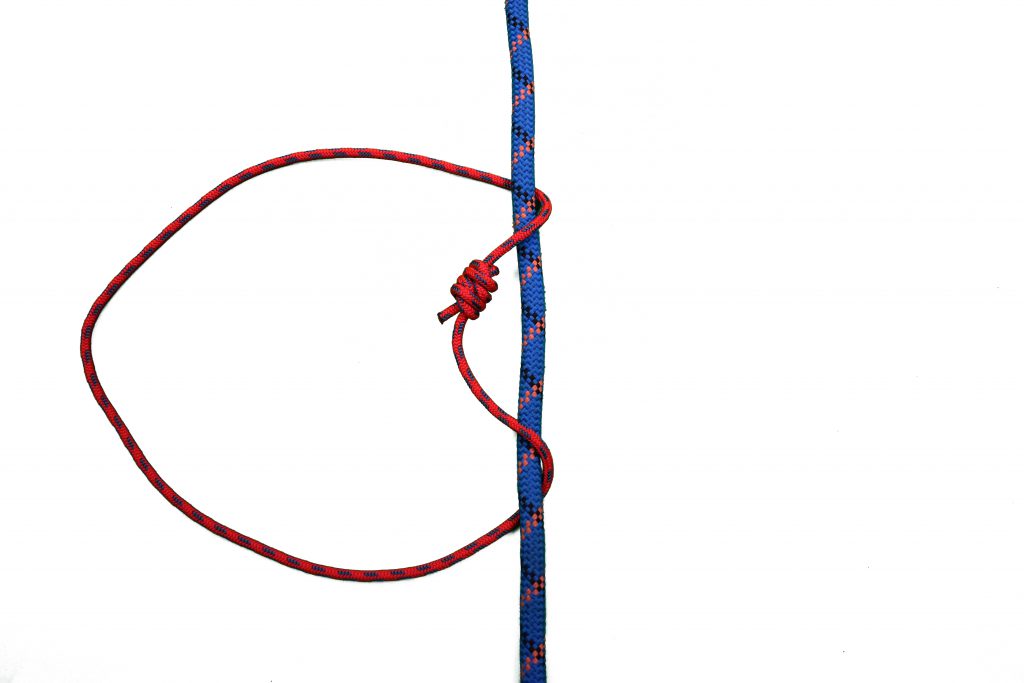
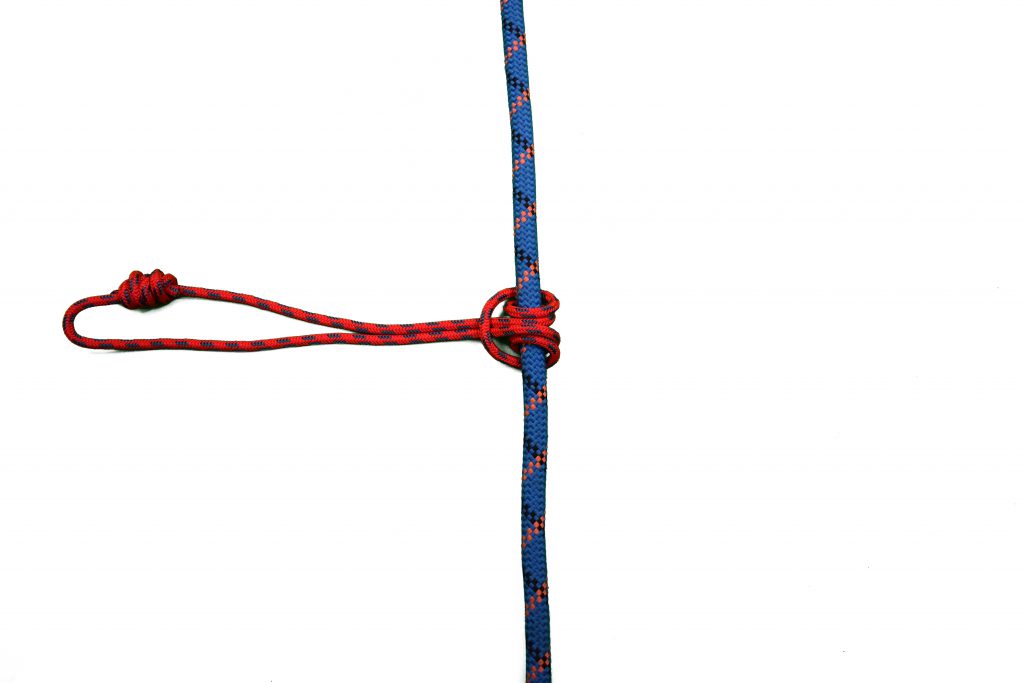
Step 3
Insert one bight inside the other bight.

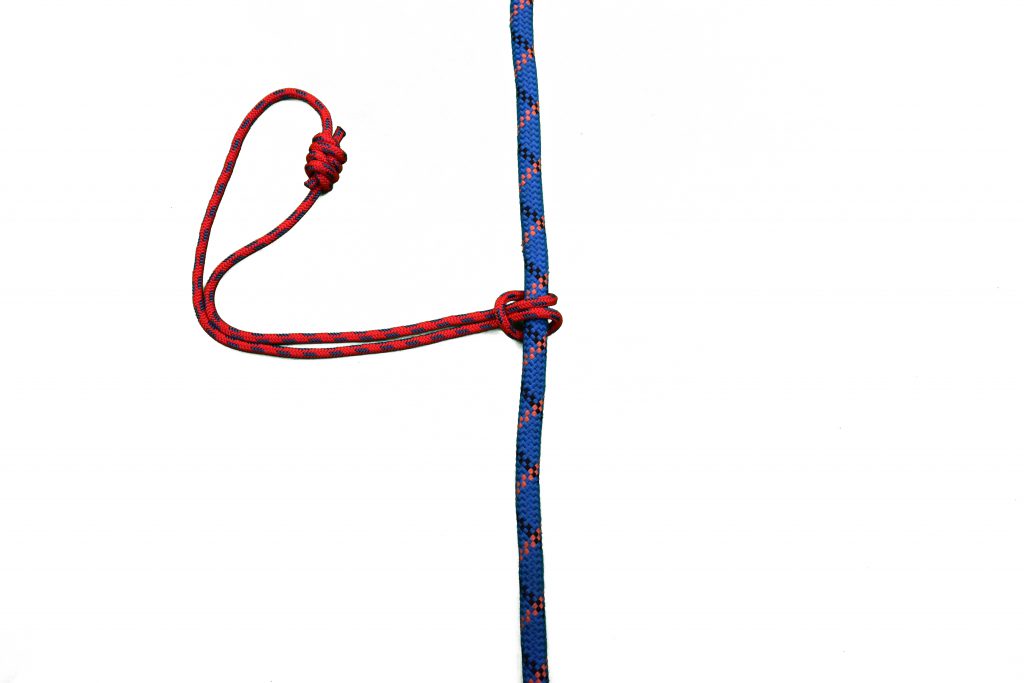
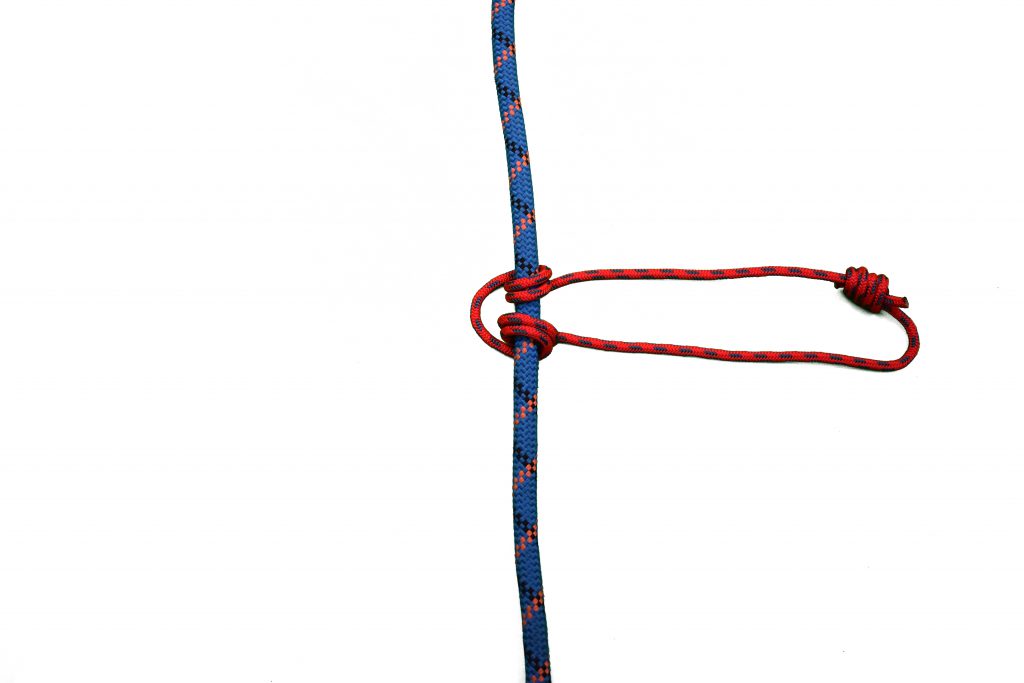
Step 4
Pull the inside bight through the outside bight and dress the knot.
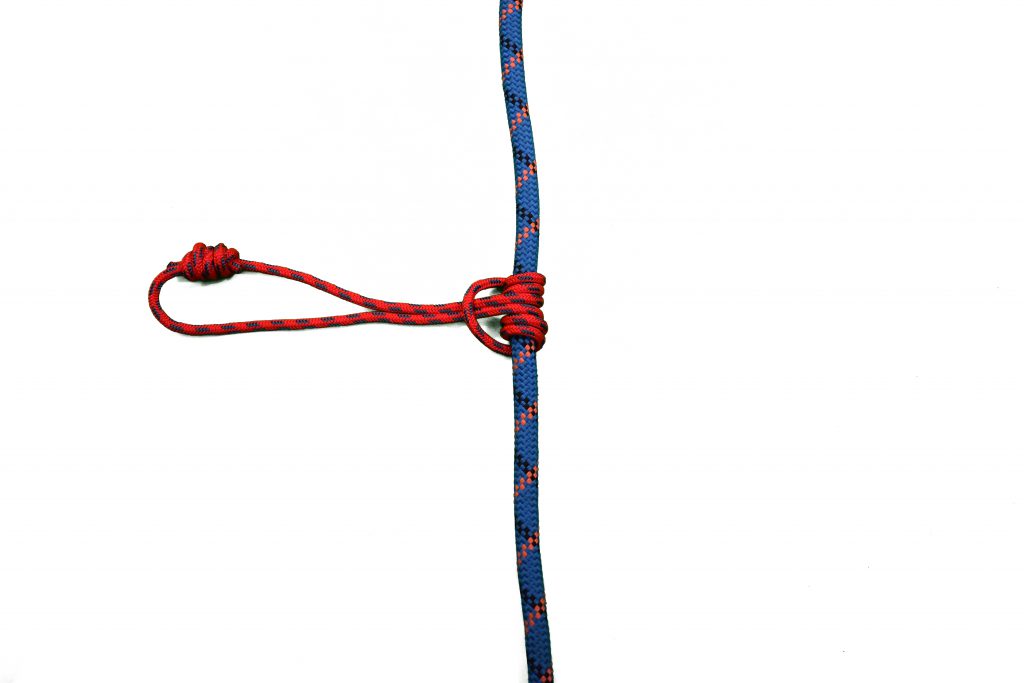
Step 5
Continue to pull but do not tighten. (The number of wraps needed depends on the D/d Ratio. In this application, this means the diameter of the prusik cord vs the diameter of the rope that the cord is being tied on).
Step 6
To add wraps pull the inside bight through the outside bight.
Step 7
Continue to pull but do not tighten.
Step 8
To add wraps pull the inside bight through the outside bight.
Step 9
Continue to pull but do not tighten.

Step 10
Final View